The schedule is your daily route. You can add jobs manually or from an approved quote, work through them in order, and complete each one on-site with photo proof. Here’s the flow.
1 Open Jobs & Schedule
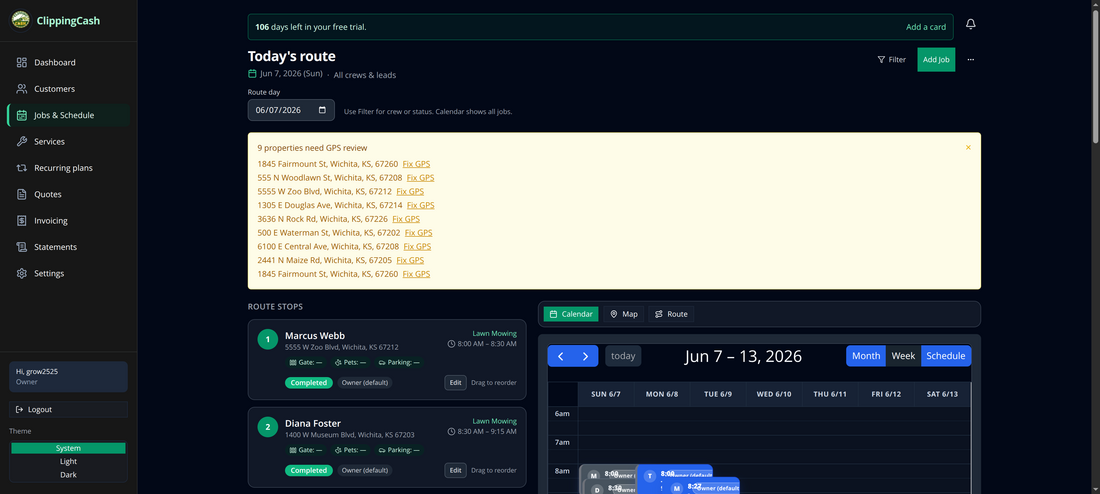
Go to Jobs & Schedule to see the day’s route as an ordered list and on a calendar. Each stop shows the customer, address, time window, and status, and you can reorder stops by dragging.
2 Add a job
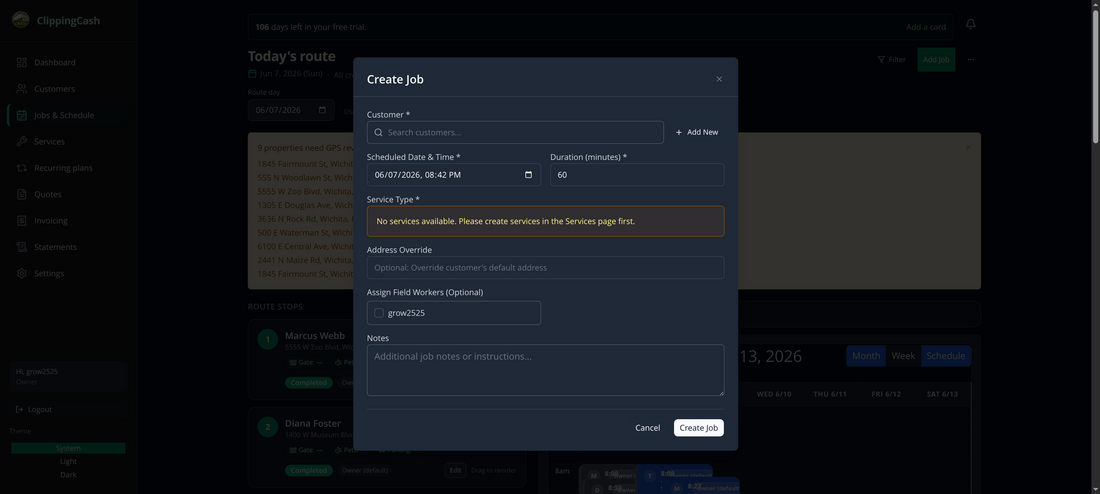
Click Add Job, choose the customer, set the date, time, and duration, pick the service, and optionally assign workers. Tick everyone going on a job, and when more than one is ticked, pick the Lead Worker. Open the job again later and the workers you saved are still ticked; untick them all to leave it unassigned. Change the date or time later from Edit Job or Reschedule and the job page, calendar and route list all show the new day. (If you don’t have services yet, add them on the Services page first.)
3 Complete it with photo proof
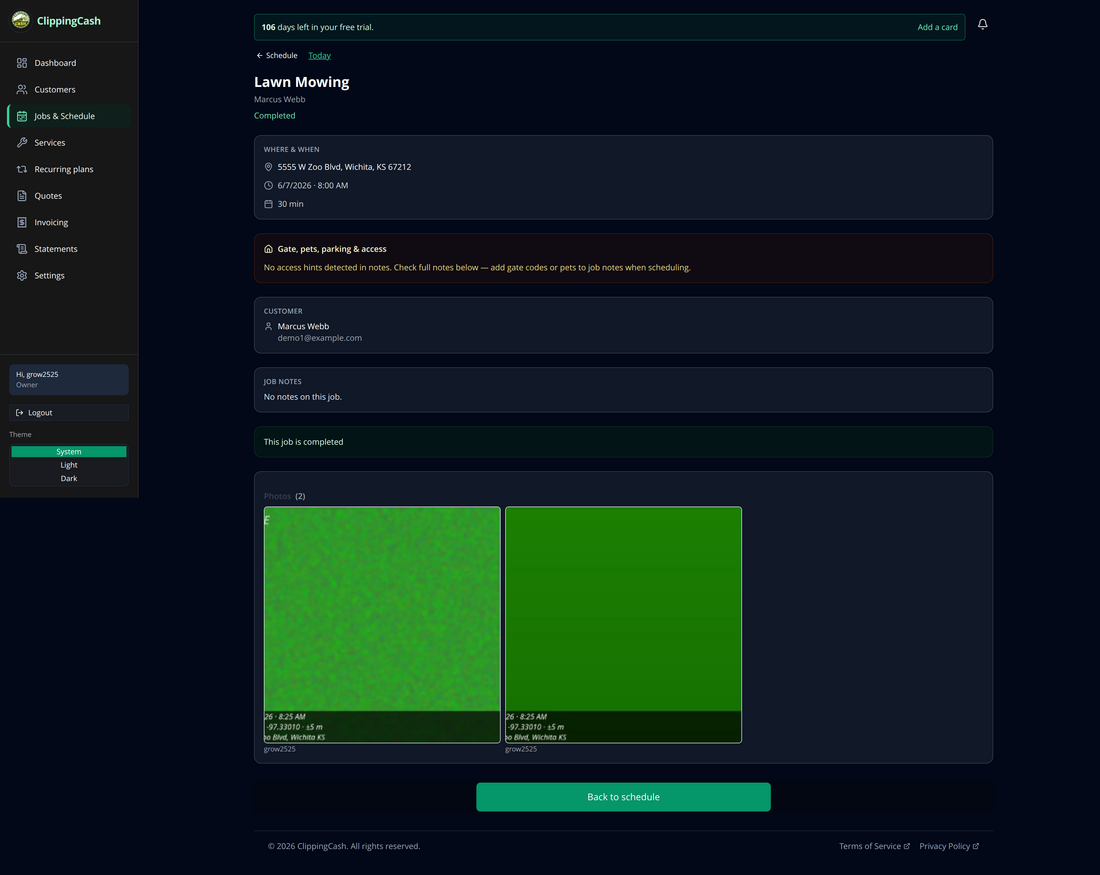
When the work is done, the crew completes the job from the field. ClippingCash captures the GPS location and time of each photo and burns a proof stamp — date, coordinates, and address — onto each one. The completed job shows your before and after photos right on the record.
4 Keep internal notes on the job
Open the job and scroll to Job notes to add a note about the visit, for example a broken sprinkler head or a dog in the yard. Each note shows who wrote it and when, oldest first. You can delete your own note for 10 minutes after adding it; after that it stays on the record. Owners, admins and office workers see every note on a job.
With the latest worker app update, the crew on the job can add notes from the worker app too, and they show here with everyone else’s.
Job notes are internal. They never show in the customer portal, on service reports, invoices or statements, or in emails and texts to the customer.